Unleashing Creativity: Alcohol Ink on Ceramic Tiles
Alcohol ink art is a fluid, spontaneous medium, and glossy ceramic tiles offer an ideal, smooth canvas. Think of it like watercolor painting, but on a non-porous surface where the vibrant inks flow, blend, and react in mesmerizing, often unpredictable ways. This unique interaction creates stunning abstract patterns and intricate designs, perfect for personalized gifts or eye-catching home accents. This guide covers the essentials to get you started.
Essential Supplies for Your Alcohol Ink Adventure
Gather these key materials before you begin:
- Ceramic Tiles: Plain white, glossy ceramic tiles work best (4x4 or 6x6 inches are great starting sizes). Ensure they are clean and smooth.
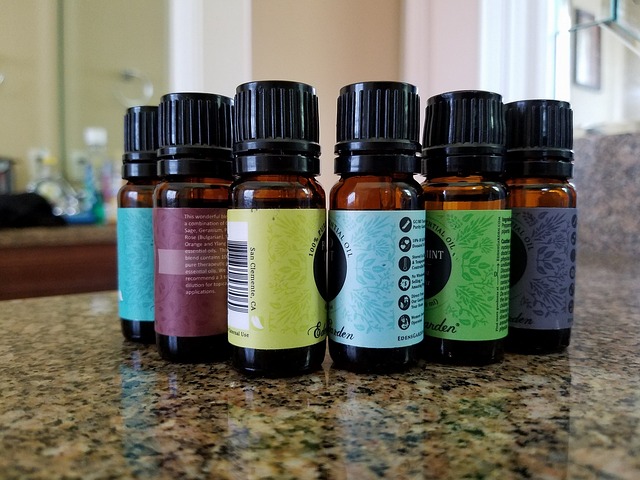
- Alcohol Inks: A variety of colors lets you explore blending possibilities. Start with a basic set; consider adding metallics or white for special effects. Popular brands include Ranger Adirondack, Jacquard Piñata, and Copic.
- Isopropyl Alcohol: Use 91% or 99% concentration for thinning inks, cleaning tiles, and creating effects. Lower concentrations contain more water, which can hinder ink flow.
- Applicators & Tools: Felt applicators/stumps for blending, fine paint brushes for details, straws or air puffer tools for directing ink flow.
- Blending Solution (Optional but Recommended): Contains additives that help inks flow and blend differently than plain alcohol.
- Sealant: Crucial for protecting your finished art. Start with 2-3 light coats of Krylon Kamar Varnish (prevents ink reactivation), followed by 2-3 light coats of a UV-Resistant Clear Spray (like Krylon UV-Resistant Clear). Epoxy resin offers a high-gloss, durable finish.
- Protective Gear: Nitrile gloves (inks stain!), safety glasses, and an organic vapor respirator mask (especially important in enclosed spaces or for prolonged use).
- Work Area Protection: Craft mat, plastic sheeting, or newspaper to cover your surface.
- Paper Towels: Essential for cleanup and dabbing techniques.
- Optional Tools: A heat gun (use on a low setting) can speed drying and create textured effects.
Your First Alcohol Ink Tile: Step-by-Step
- Prepare Your Tile: Wipe the glossy surface thoroughly with 91%+ isopropyl alcohol and a lint-free cloth to remove any oils or dust. Allow it to air dry completely.
- Apply the Ink: Add a few drops of your chosen alcohol ink colors directly onto the tile. Experiment with placing colors side-by-side or slightly overlapping.
- Blend and Move the Ink: Add a few drops of isopropyl alcohol or blending solution near the inks. Gently tilt the tile, use an air puffer or straw to blow the inks, or dab/swipe with a felt applicator to encourage blending and movement. Observe how the colors interact.
- Layer and Refine: Continue adding ink and alcohol/blending solution sparingly. Allow layers to partially dry (become tacky) if you want more defined separation. Remember, you can always add more, but it's harder to take away.
- Dry Completely: Let the tile air dry flat for several hours, or even overnight, until the ink is fully set. You can *carefully* use a heat gun on a low setting, keeping it moving constantly, to speed drying, but avoid overheating which can cause bubbling or cracking.
- Seal Your Masterpiece: **Wait at least 24-48 hours** for inks to fully cure before sealing. In a well-ventilated area, apply 2-3 *light, even* coats of Kamar Varnish, letting each coat dry completely (follow can instructions). This creates a barrier. Then, apply 2-3 *light, even* coats of UV-Resistant clear spray sealant. Alternatively, after the Kamar Varnish, apply a flood coat of epoxy resin following manufacturer directions for a super glossy, durable finish.
Pro Tips for Eye-Catching Designs
- Embrace the Flow: Alcohol ink thrives on spontaneity. Let go of precise control and enjoy the organic patterns that emerge.
- Color Choices: Use a color wheel to find appealing combinations. Contrasting colors create drama, while analogous colors offer harmony.
- Less is More: Start with fewer drops of ink and alcohol. You can always add more intensity or fluid.
- Experiment Freely: Try dripping ink onto wet alcohol vs. a dry tile. Use different tools (brushes, sponges, q-tips) for various textures.
- Layering Magic: Allow layers to partially or fully dry before adding more ink on top to create depth and visual interest.
- Metallic Accents: Add drops of metallic ink (gold, silver, brass) for a touch of shimmer and elegance.
- Troubleshooting: Don't love it? While the ink is wet, you can sometimes manipulate it further. If fully dry, you can often wipe the tile completely clean with isopropyl alcohol and start over!
Protecting and Displaying Your Art
Sealing isn't just recommended; it's crucial! Unsealed alcohol ink can fade quickly when exposed to UV light and can be reactivated by moisture or handling. Use a UV-resistant final sealant or resin. Apply multiple *thin* coats for better protection than one thick coat. Once sealed (especially with resin), tiles can often serve as decorative coasters or trivets (for moderate heat), but treat them gently. Clean only with a soft, damp cloth – avoid harsh chemicals or abrasive scrubbing.
Explore Further: Resources & Inspiration
Ready to dive deeper? Explore online communities (like dedicated Facebook groups), check out video tutorials on YouTube for visual guides and advanced techniques, and visit manufacturer websites for specific product information and galleries.