Introduction: What is Punch Needle?
Punch needle is a fiber art technique that creates textured designs, often resembling miniature rugs or plush embroidery. Using a special hollow needle tool, you punch loops of yarn *through* a foundation fabric. Unlike traditional rug hooking where loops are pulled up, punch needle pushes them down, creating the characteristic looped pile on the *opposite* side of the fabric you work on. It's a wonderfully rhythmic and relatively quick craft to learn.
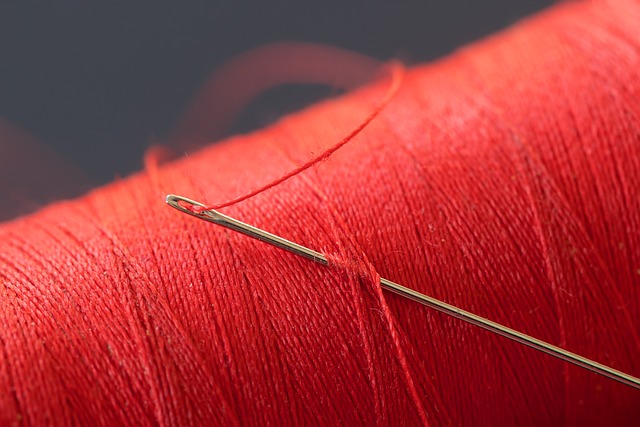
Essential Supplies for Punch Needle
Gathering the right tools is key to a smooth punching experience:
- Punch Needle Tool: Select a needle size compatible with your chosen yarn weight. Sizes range from fine needles for embroidery floss to large adjustable needles for bulky rug yarn.
- Foundation Fabric: Monk's Cloth is the gold standard for beginners and rug projects due to its loose, even weave that accommodates thick yarn and allows for repositioning stitches. Linen and primitive linen are other options, often used for finer work.
- Yarn: Rug yarn (wool or durable acrylic blends) is ideal for actual rugs. For wall hangings or pillows, you can experiment with various fibers like cotton, wool, or novelty yarns for different textures.
- Sturdy Hoop or Frame: Essential for keeping the foundation fabric drum-tight. A non-slip embroidery hoop, Q-snap frame, or a dedicated gripper strip frame works best. Loose fabric leads to uneven loops.
- Sharp Scissors: For cleanly snipping yarn tails.
- Design Transfer Tool: A permanent marker or fabric pen to draw your design onto the foundation fabric.
- Rug Backing (Optional but Recommended): For finishing rugs, options include latex adhesive applied to the back to lock stitches, or a sewn-on fabric backing for a neat finish and floor protection.
Step-by-Step Punch Needle Technique

- Prepare Your Fabric: Stretch the foundation fabric tightly within your hoop or frame, ensuring it's even and taut like a drum.
- Transfer Your Design: Draw or trace your pattern onto the working side (the non-looped side) of the fabric using your marker.
- Thread the Needle: Follow your specific tool's instructions. Ensure the yarn feeds smoothly through the needle's channel and eye without snagging.
- Start Punching: Hold the needle vertically like a pen. Punch the needle *all the way down* through the fabric until the handle base touches the surface. *Slowly* pull the needle straight back up, just enough for the tip to clear the fabric. *Important:* Keep the needle tip close to the fabric surface as you slide it forward to the next stitch location. Lifting the needle too high will pull out your loops.
- Follow Your Design: Outline sections first, then fill them in. Keep stitches close together (typically 6-10 stitches per inch, depending on yarn) for dense coverage. The actual loops form on the *opposite* side of the fabric.
- Finish and Secure: Once punching is complete, carefully remove the project from the frame. Trim any long yarn tails *flush with the loops* on the pile side. On the flat/working side, you can optionally apply fabric glue or latex backing to secure stitches permanently, especially for rugs.
Tips for Beautiful Punch Needle Results
- Master Tension: Keep fabric taut in the frame and ensure yarn flows freely from the skein/ball without pulling.
- Needle Angle & Direction: Always keep the needle perpendicular to the fabric when punching. The open slit/channel of the needle must face the direction you are moving.
- Consistent Stitch Length: Aim for uniform spacing between punches for an even pile height. Practice on a scrap piece first!
- Work Outlines First: Punching the outline of a shape before filling it in helps create clean definition.
- Secure Ends (Working Side): Leave a short tail when starting and ending a color; these can be tucked under adjacent stitches or secured with glue later.
- Choose Appropriate Yarn: Bulky yarn in a fine needle won't work, and vice versa. Match yarn weight to needle size for best results.
Exploring Advanced Techniques & Designs
Beyond the basics, explore creating texture variations by using an adjustable needle to change loop heights within one piece ('sculpting'). You can also shear the loops after punching to create a plush, cut-pile velvet effect. Experiment with blending colors like paint, incorporating unconventional fibers, or translating intricate illustrations into punch needle art.
Resources for Your Punch Needle Journey

The punch needle community is vibrant! Look for tutorials on YouTube and Instagram, browse patterns on Etsy, join online forums or Facebook groups dedicated to the craft, or check local yarn stores for workshops. Books by artists like Arounna Khounnoraj (Bookhou) or Amy Oxford offer excellent guidance.